APARTMENT DIY: No Nails Slat Wall
Adapting back to apartment life has had its challenges, but I have found beauty in "calling the landlord" when something goes wrong. As you know from the blog – this is not a luxury I've had for quite some time! I've grown to love our little place. It's quietly tucked between two other stand alone "mini houses" with off-street parking, laundry, and private outdoor space which is pretty rare for LA. We live next to my dear friend and rotate dinners (which is AMAZING with all of our busy schedules), watch each others dogs, take out each others trash, the list goes on. Basically, we can never move.
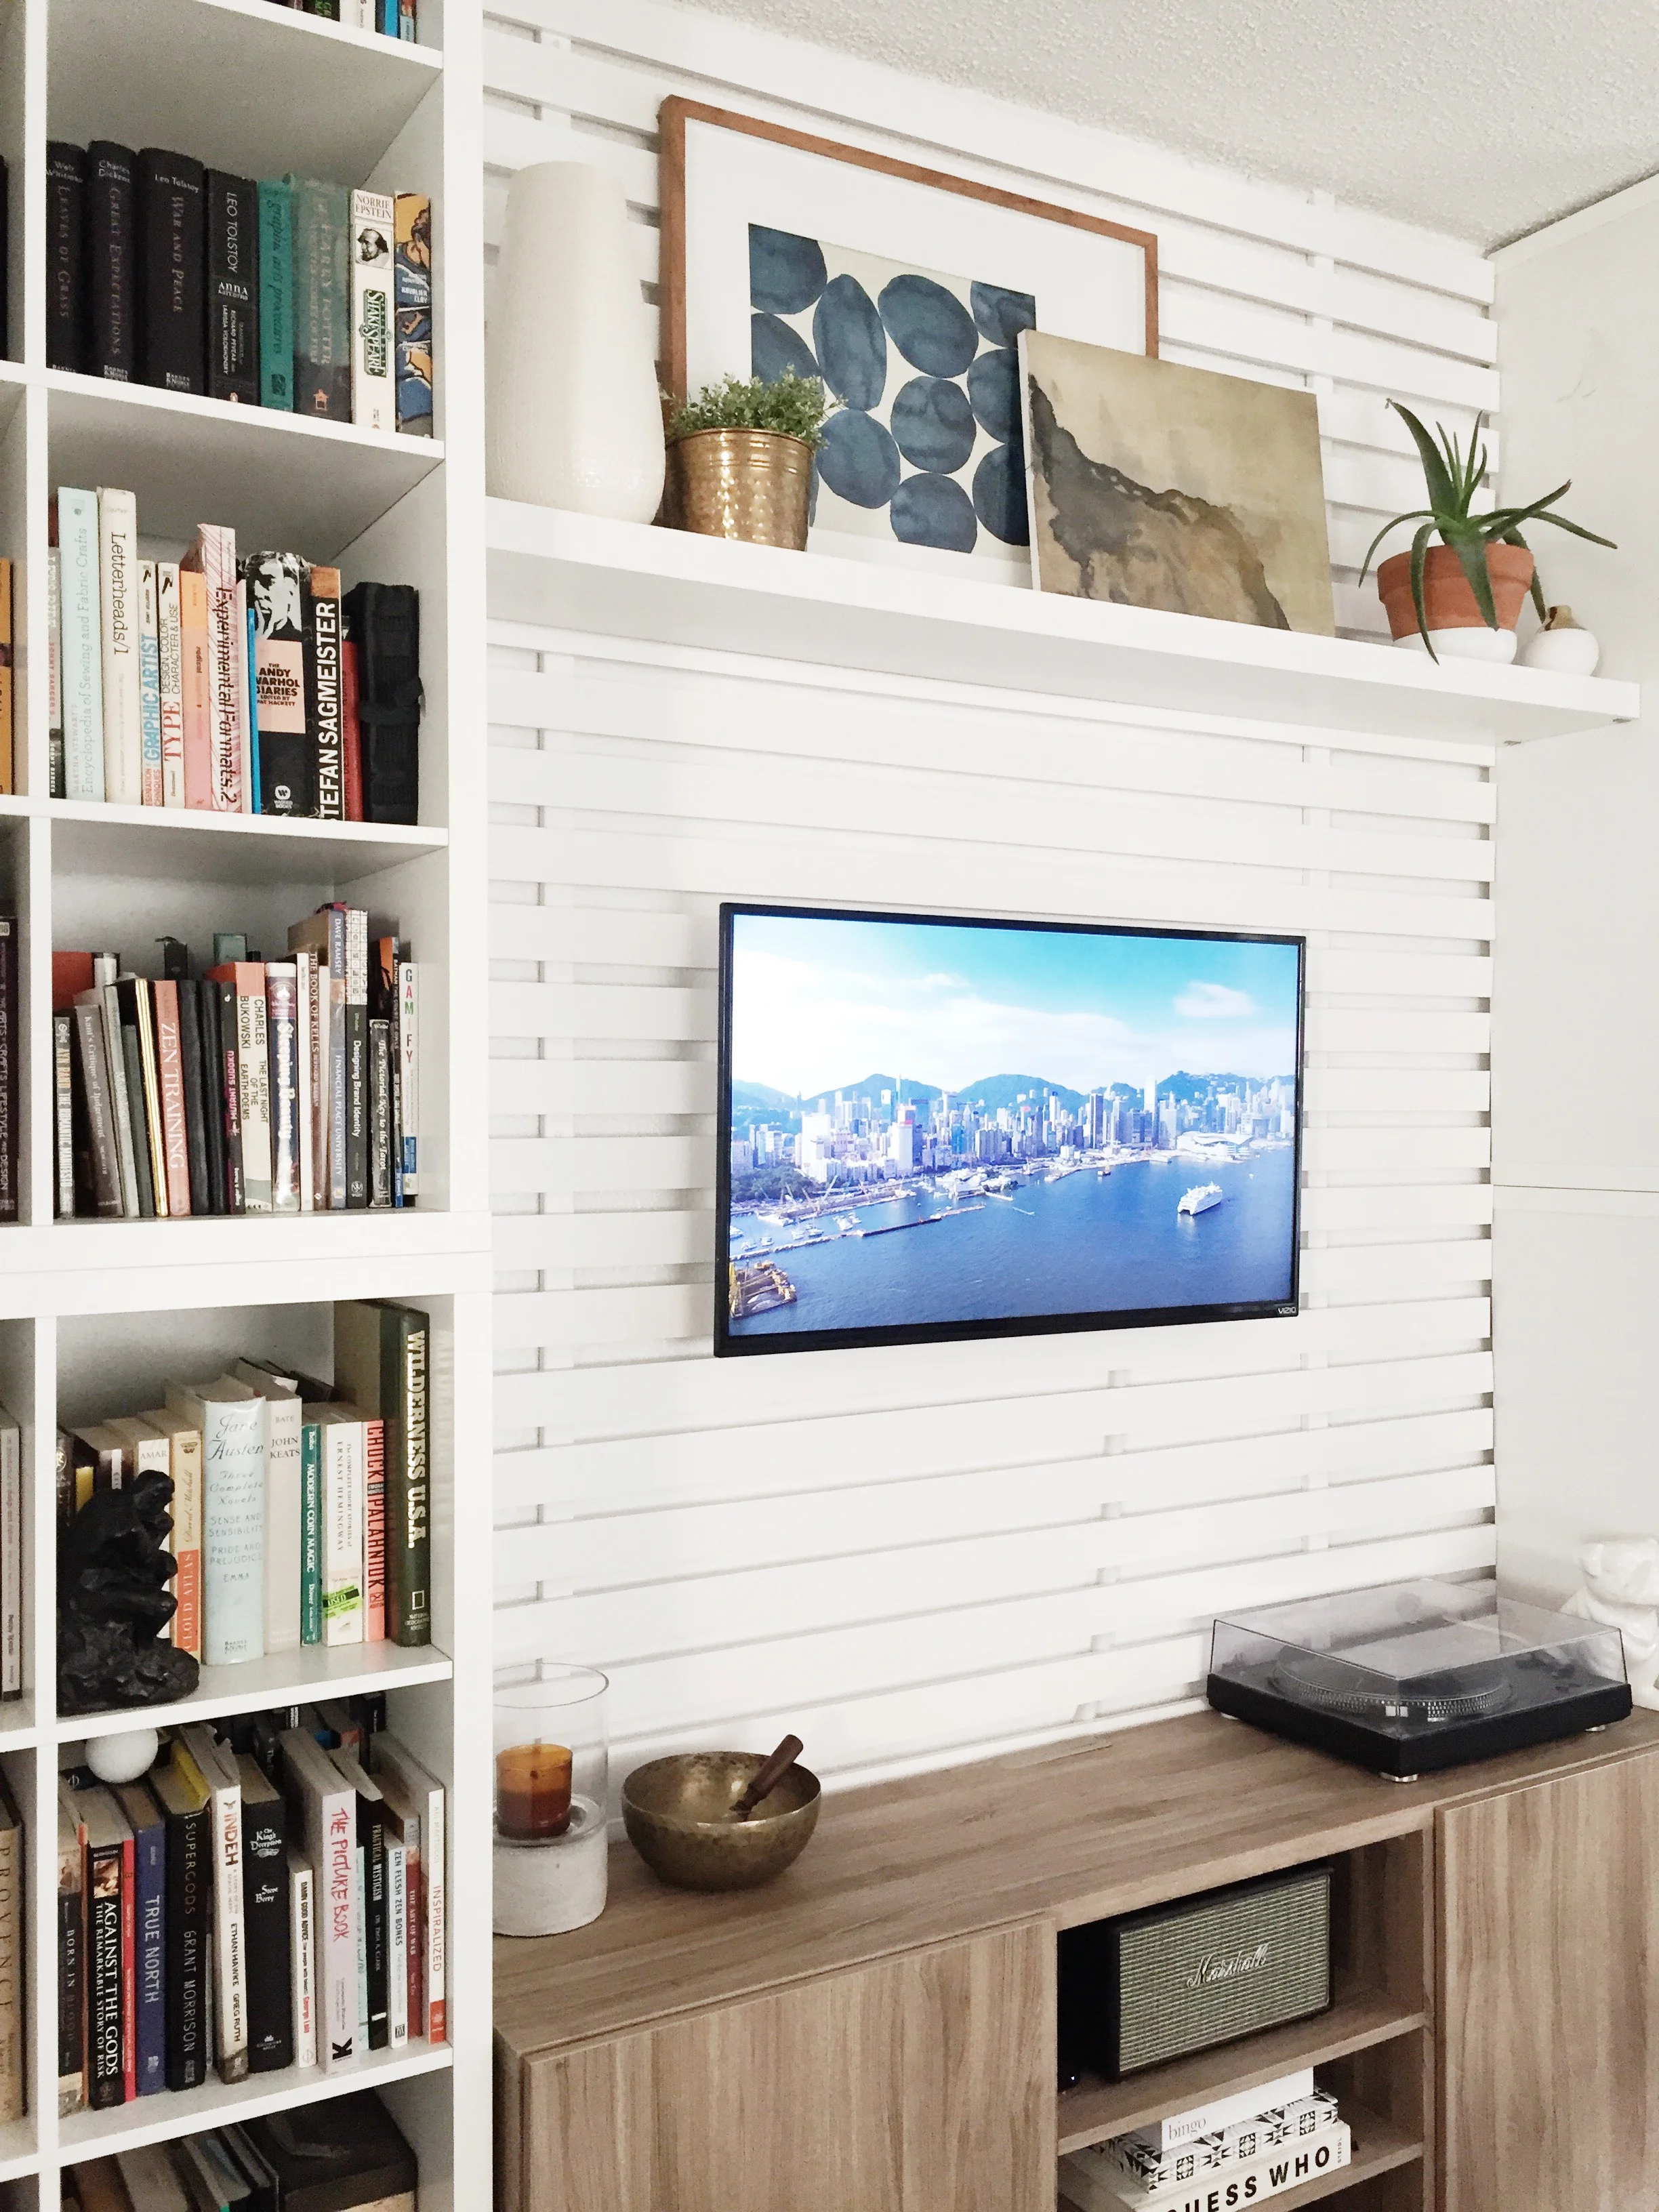
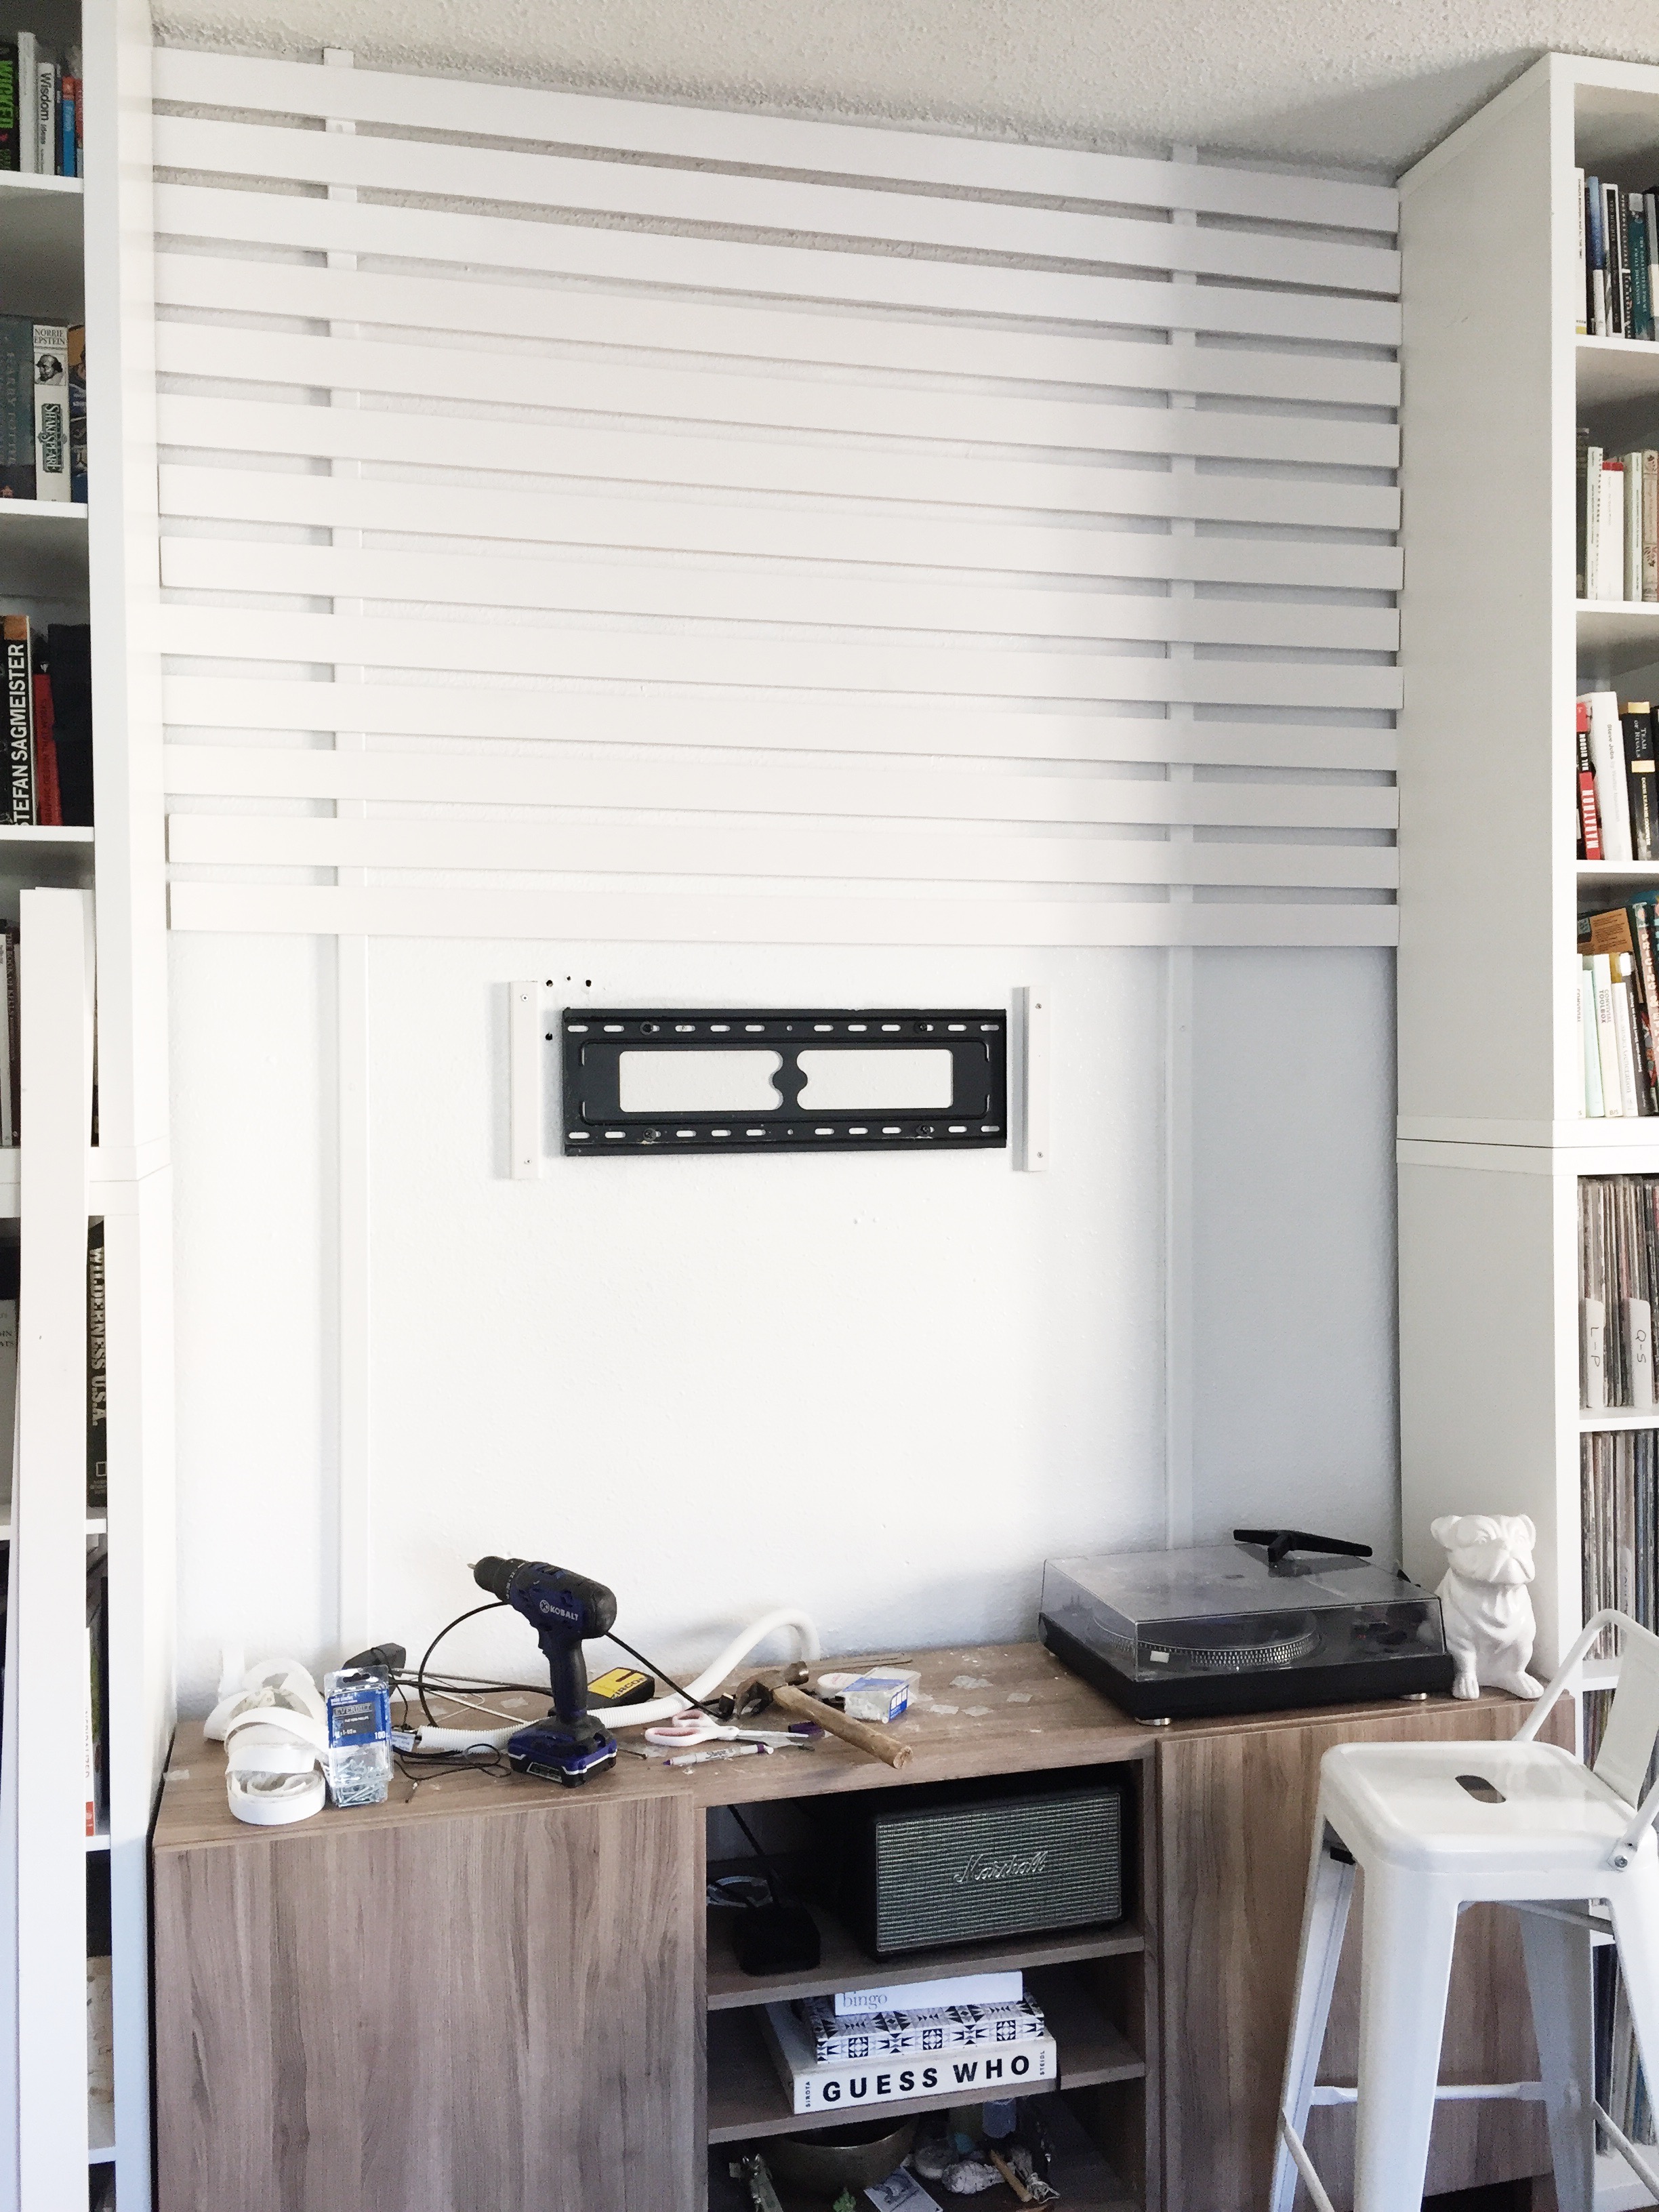
The interior has been a real struggle because I'm use to making decisions that are permanent, so I've gotten verrryyyy creative about creating solutions that feel built-in, but are very easy to remove and take along on our next adventure. This slat wall concept has been living in my brain since we moved in and we had quickly made an IKEA run to create a solution to our non-existent storage problem. We configured the bookshelves and TV stand into an entertainment wall and wanted to add dimension and something to hide the cords. I loved the slat wall idea, but the thought of having to transport, cut, paint, nail, patch, paint again was paralyzing and this very sad wall stayed like this for almost a year. (Don't judge the off-centered TV. I hung this myself while Brandon was at work which was a bad idea on so many levels.)

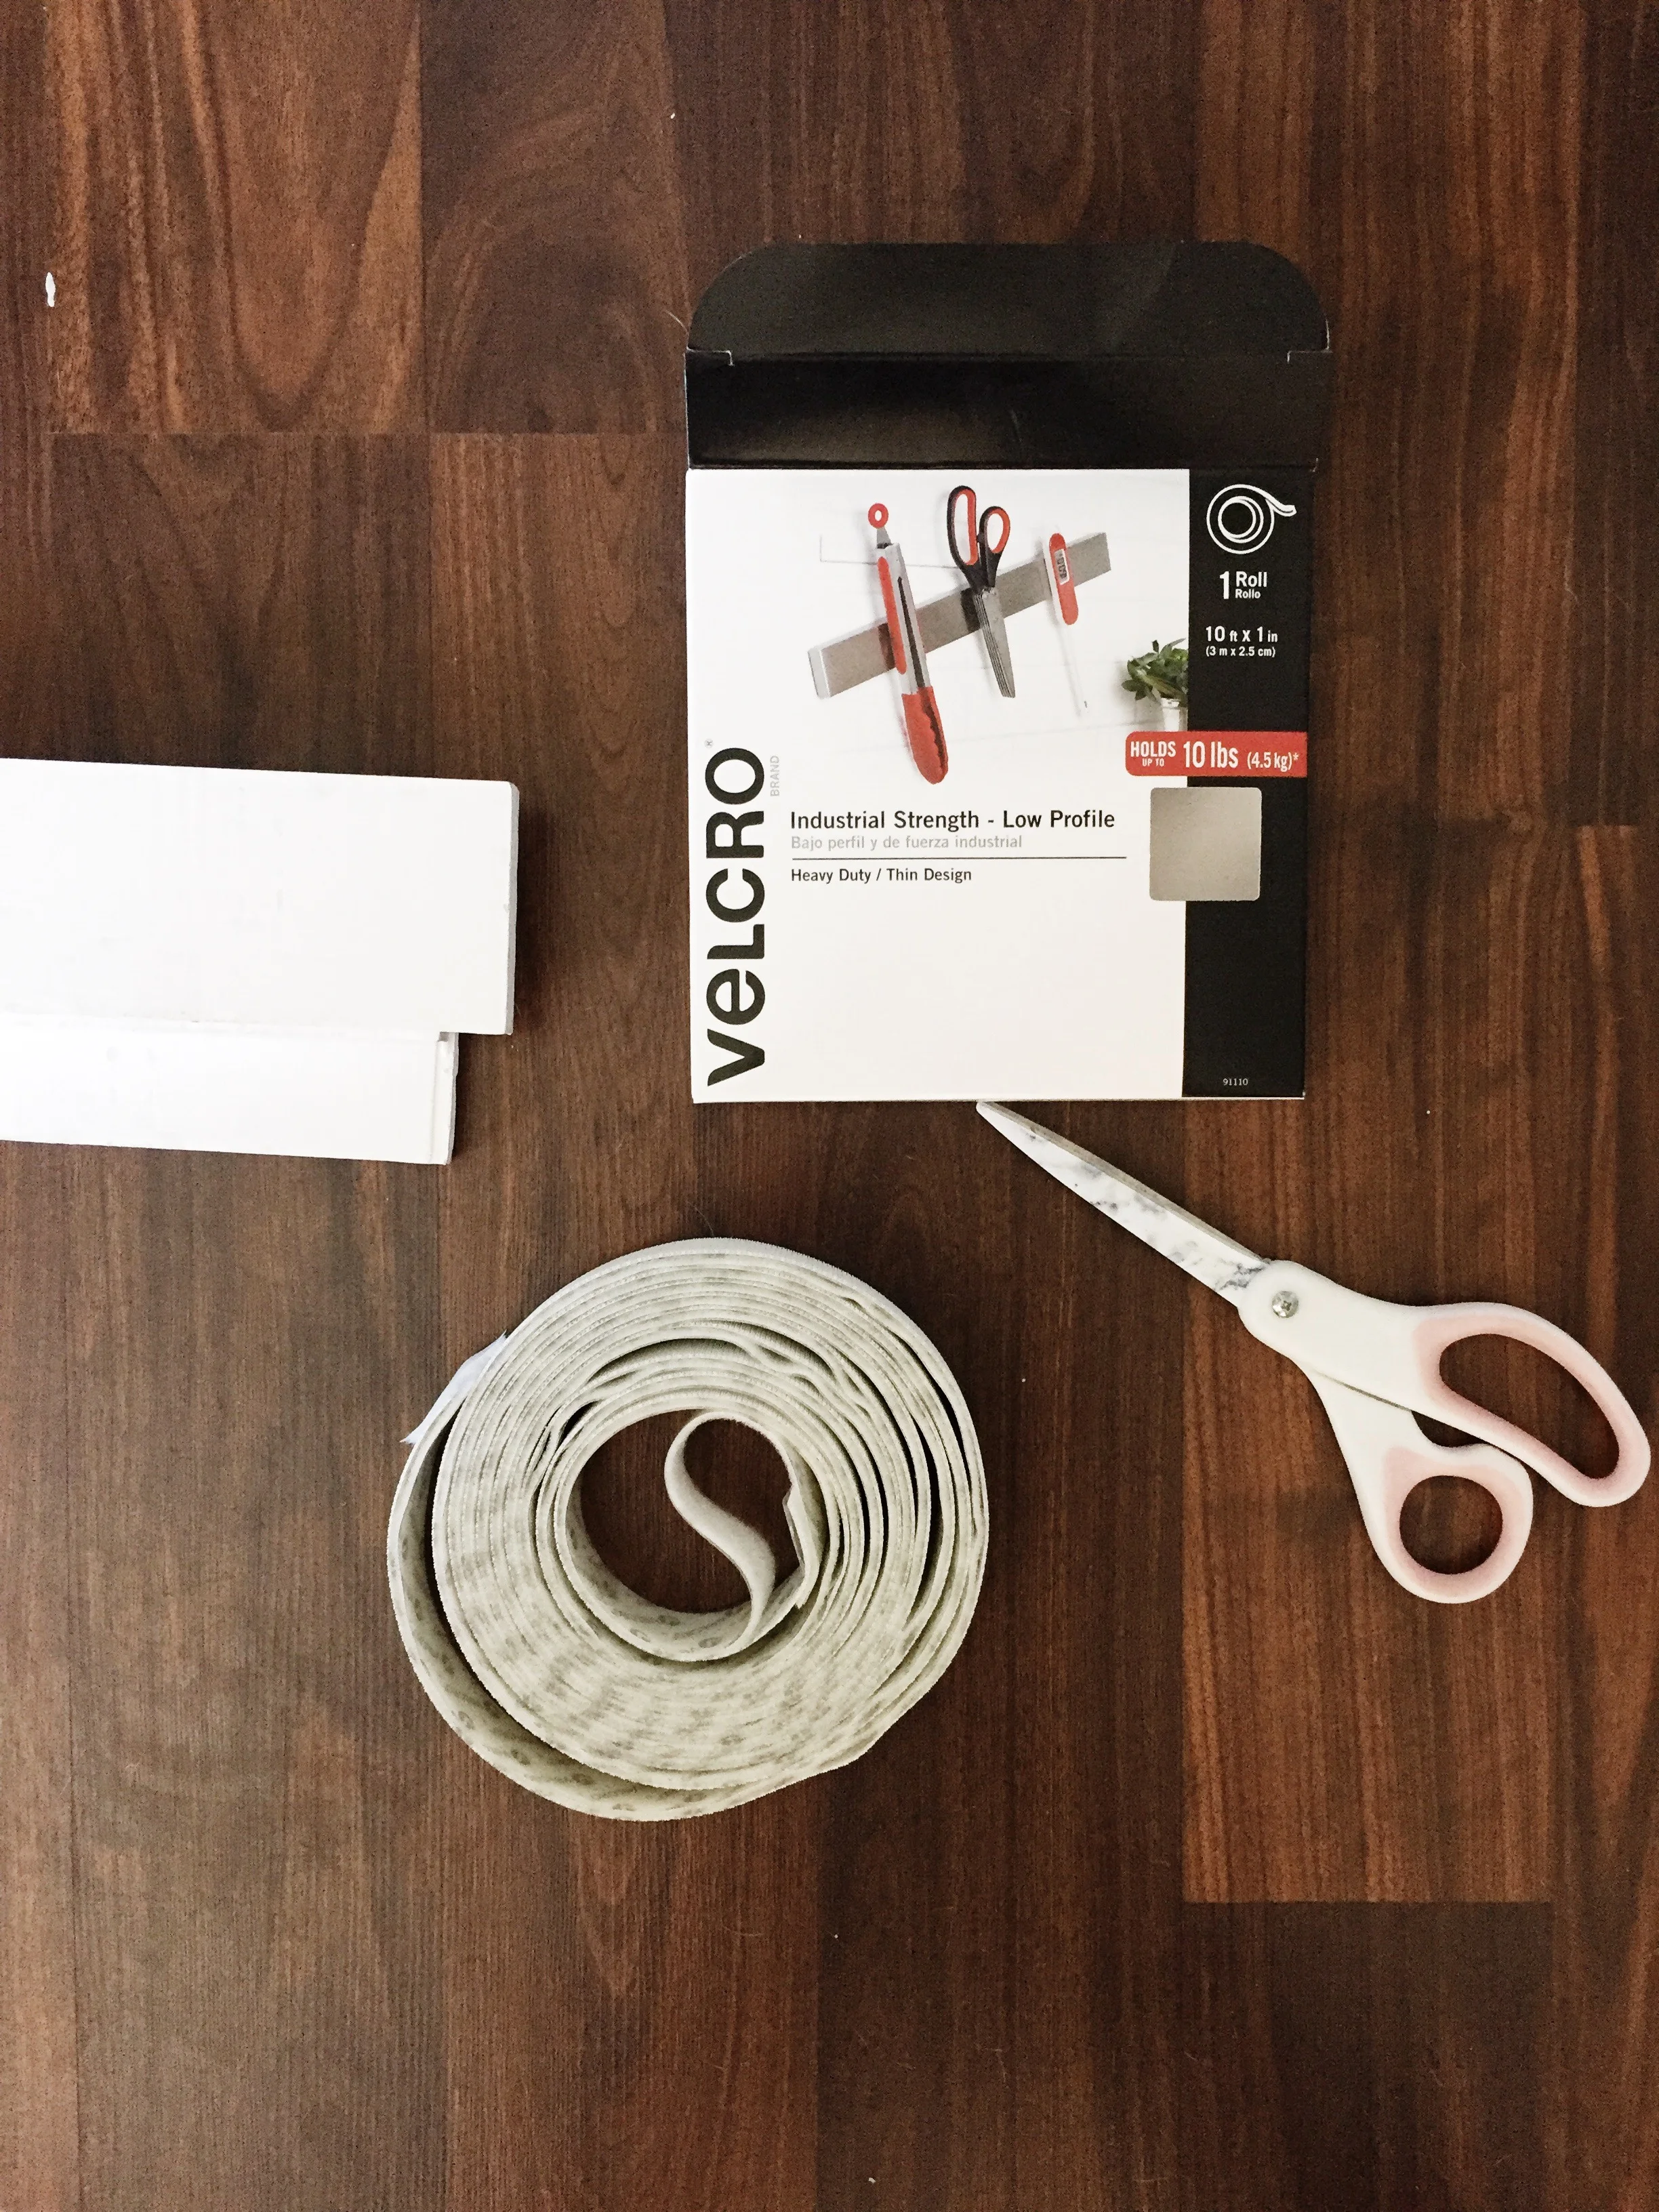
So, one day I had some time on my hands and brought the idea back to life. This time, I thought of the idea backwards – the removal process. What could I use that would hold the slats, but also be removable if I wanted to get to the chords or I took it down all together? BINGO. Industrial strength velcro!
Below you will find the steps to achieve a removable slat wall with only 6 screws (pending ceiling height).
What you need:
1. PRIMED* multi-purpose boards from Home Depot. These come in various sizes – we used the 2.5" size and created 1" spacing using the thickness of the level.
2. 1" PRIMED* trim boards - these will be used to attach to your wall.
3. Industrial Strength Velcro.
4. Scissors
5. Drill
6. Proper screws for your wall conditions (and anchors if needed)
7. Level
8. Stud Finder
9. Miter Box (if you need to cut your pieces to fit around the TV)
*You don't have to buy the boards primed, but it will save you a lot of time.
STEP 1: Measure the width and height of your desired space. Divide your desired board width evenly and subtract the spacing to get the number of boards you will need.
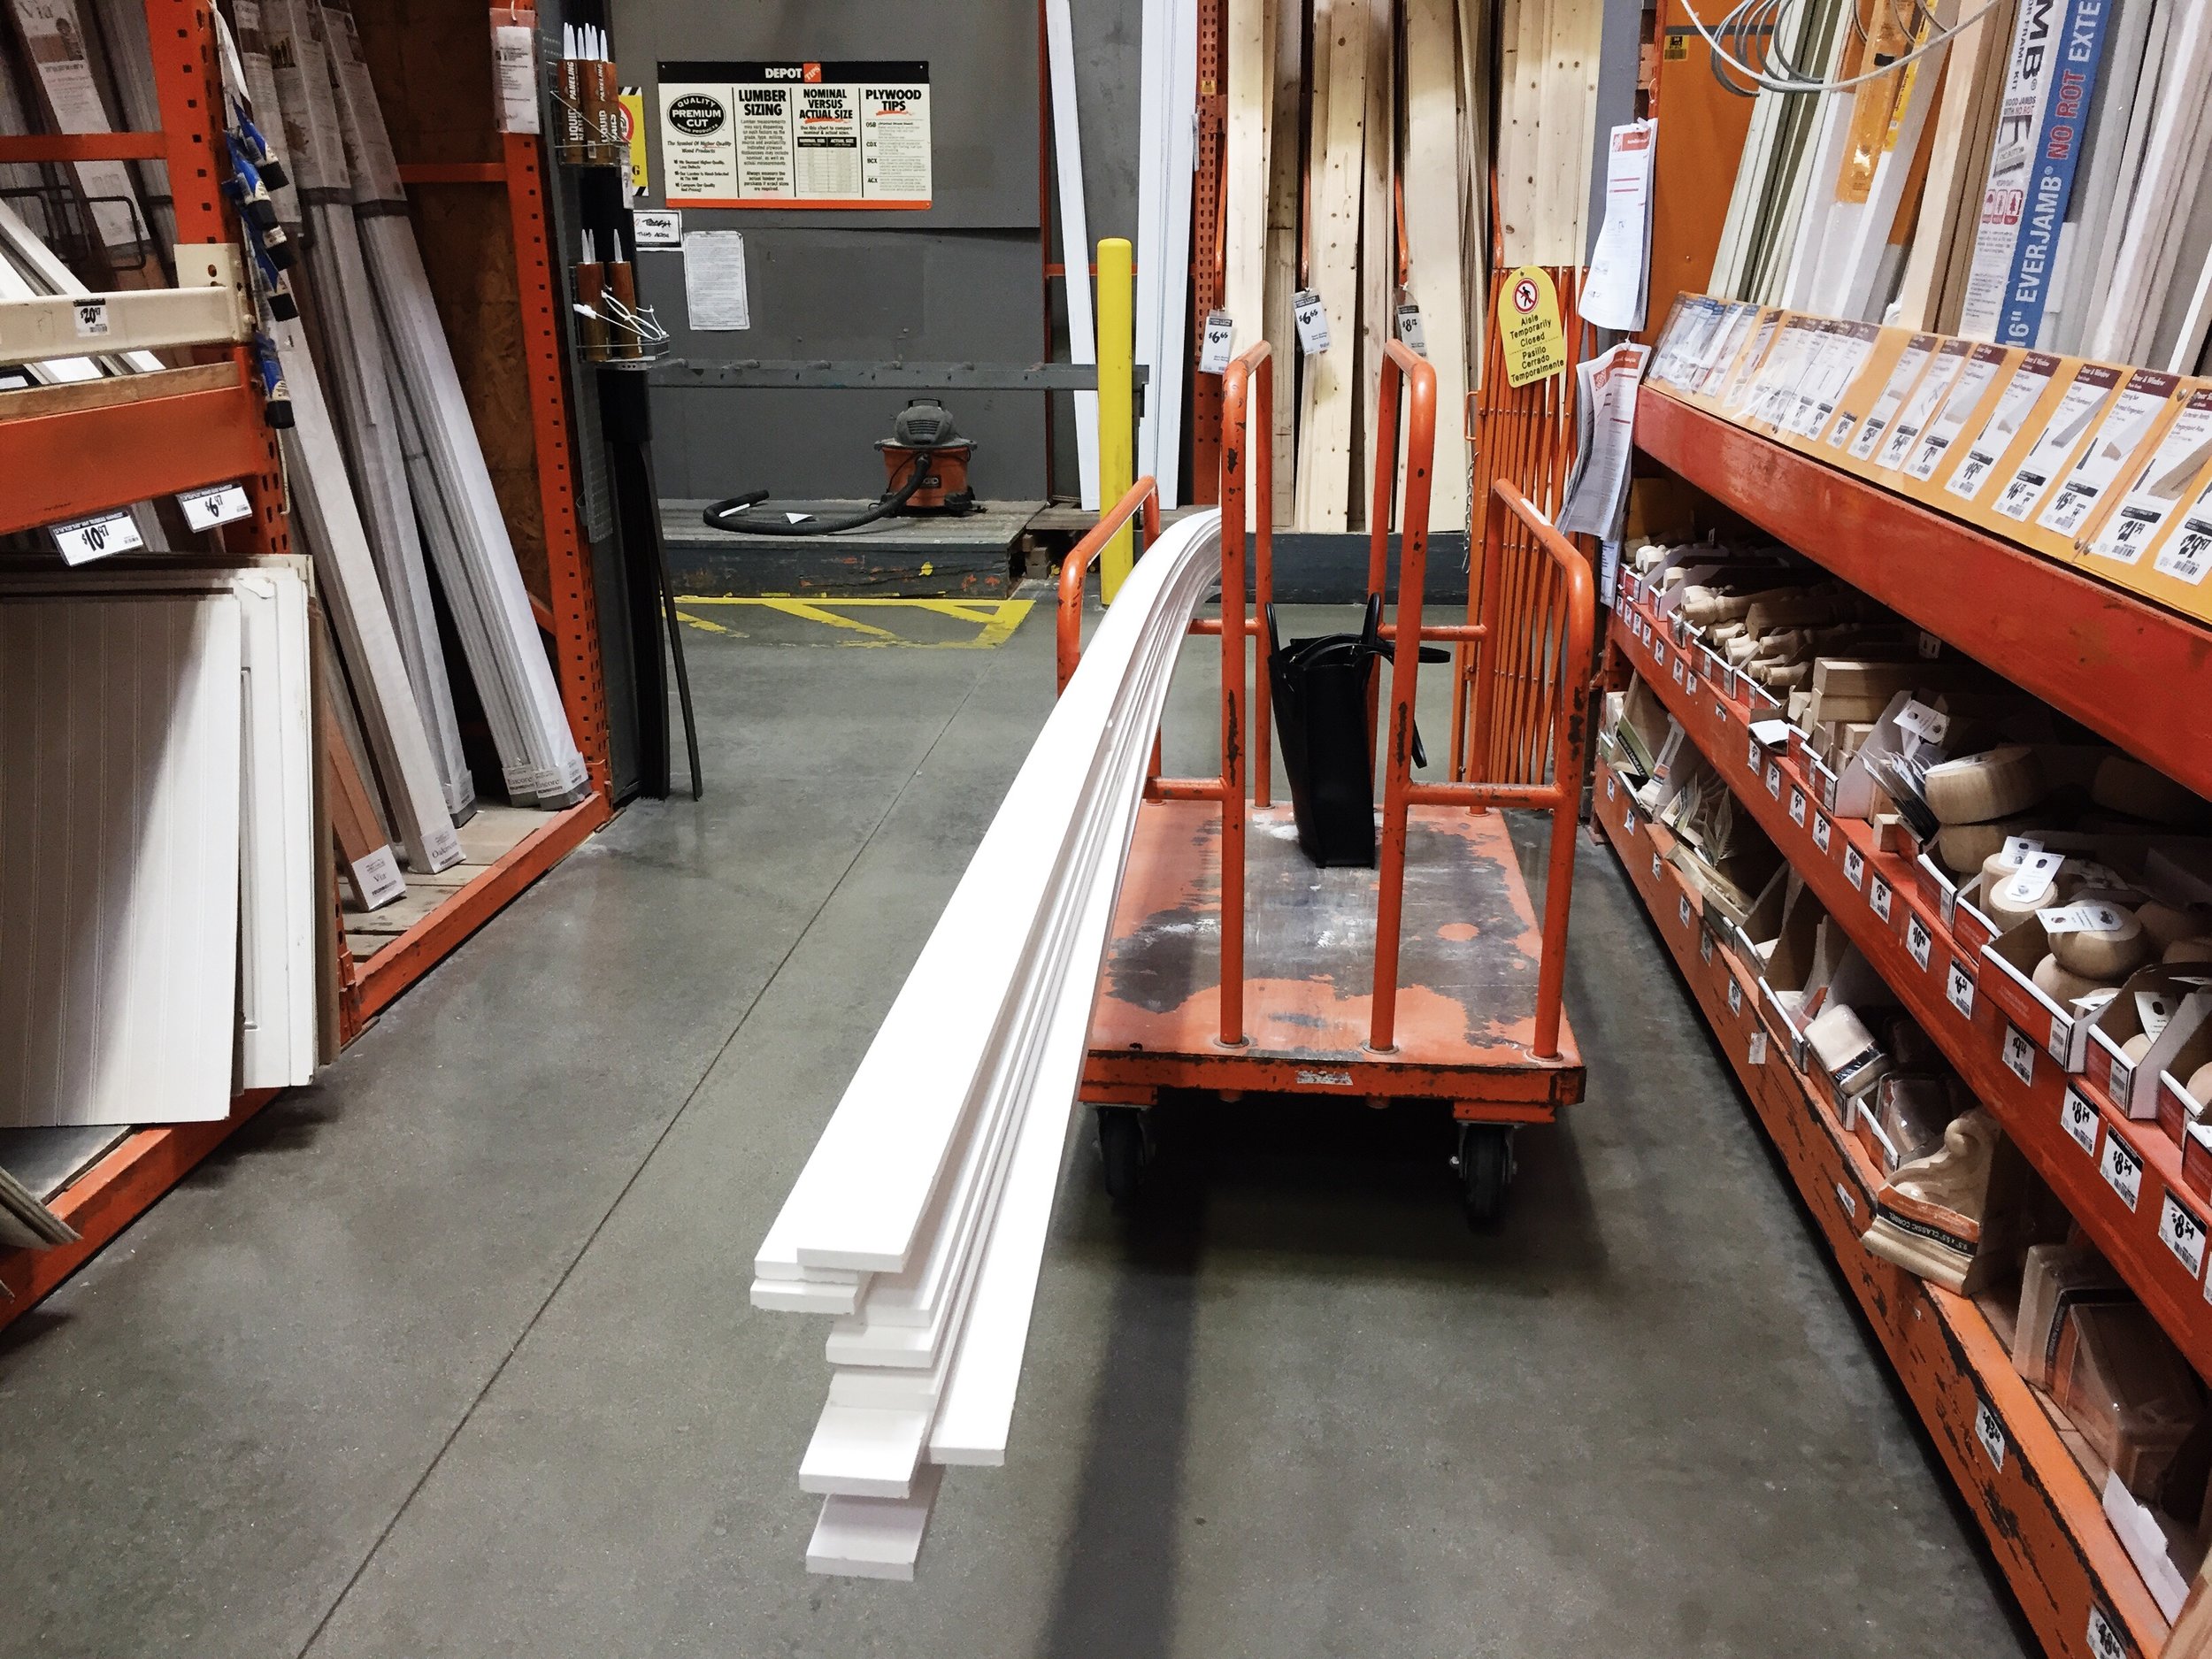
I used 2.5" boards with 1" spacing in between to get a total of 20 boards.
STEP 2: Find a very, VERY nice person at your lumber yard of choice to cut your boards down the the final width. Thanks to my local Home Depot, I walked out the door with everything cut to size so that I didn't spend my day figuring out how to transport to my apartment and cut them down.
STEP 3: Using your stud finder, located the studs and attach your 1" trim pieces vertically from ceiling to your desired height. The boards are very light weight, so you don't need to go crazy with screws to attach the strips.
STEP 4: Starting at the top, roughly apply both sides of the velcro to the wall strip where your first board will go. Make sure the first board is level as this will be a guide for you all the way down. Press the board onto the velcro and voila!
To make it easy, I used a level that was 1" thickness, so I simply turned the level on it's side and placed the next board all the way down to have an even thickness.

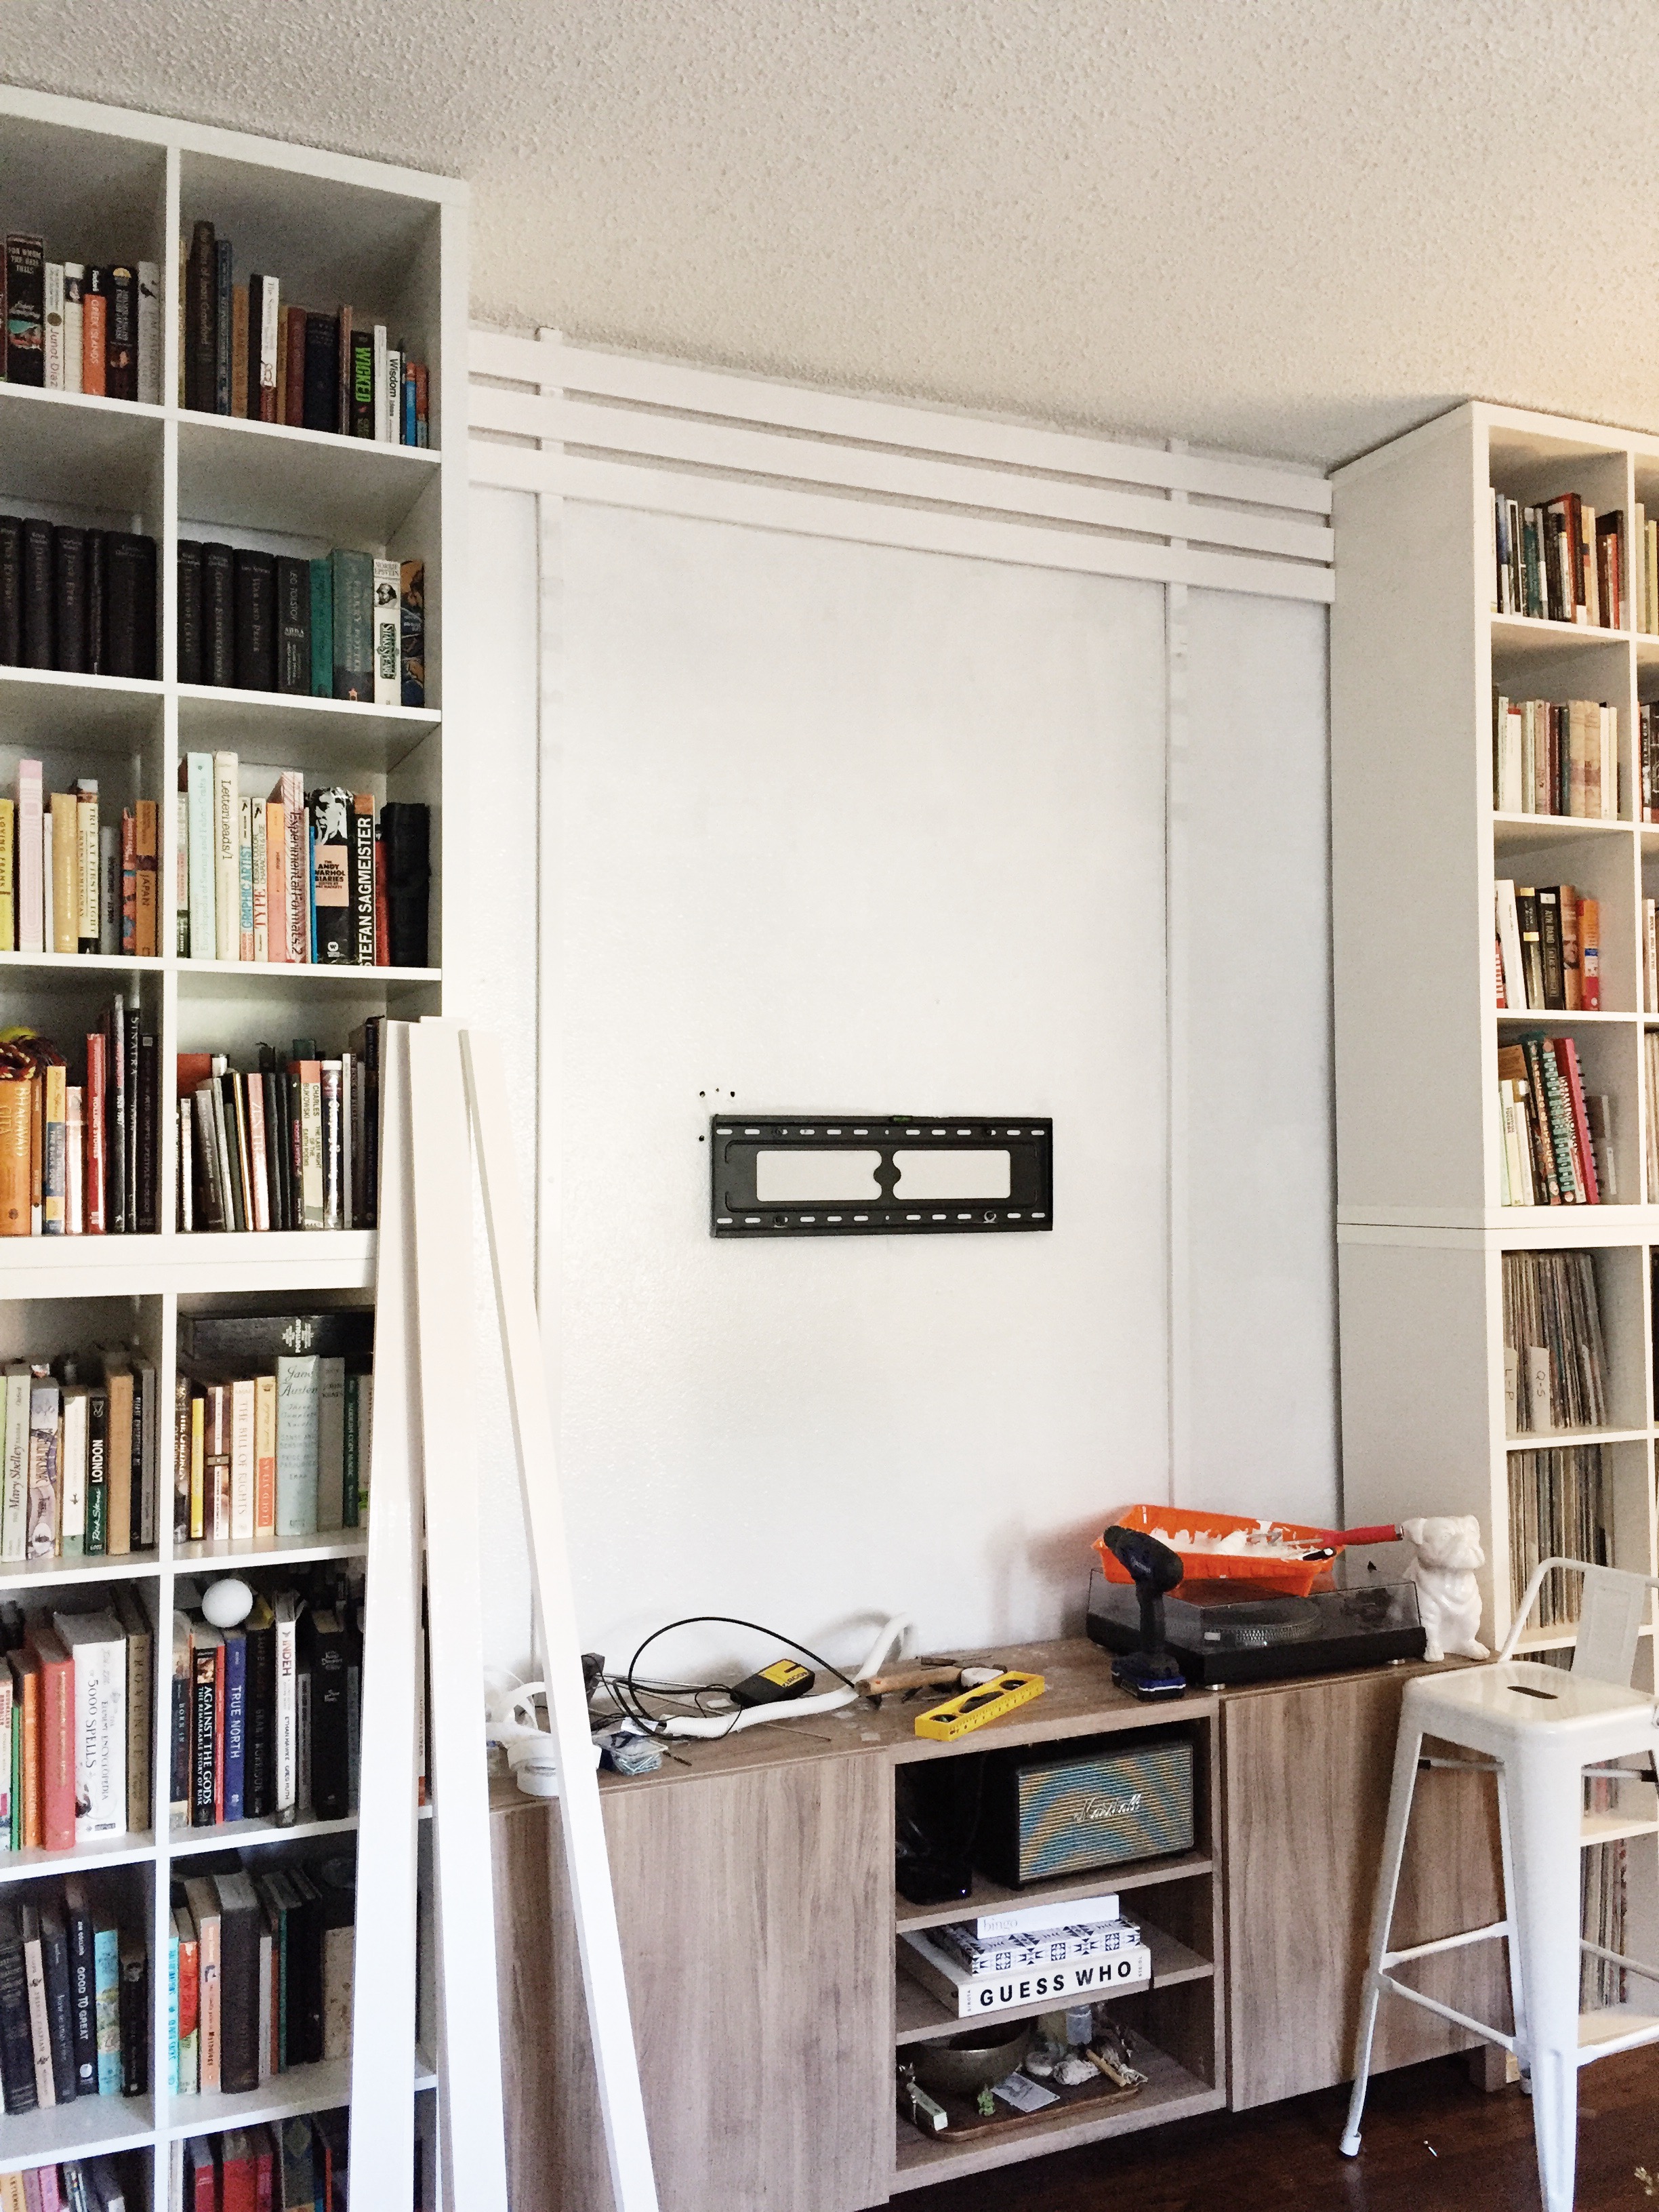
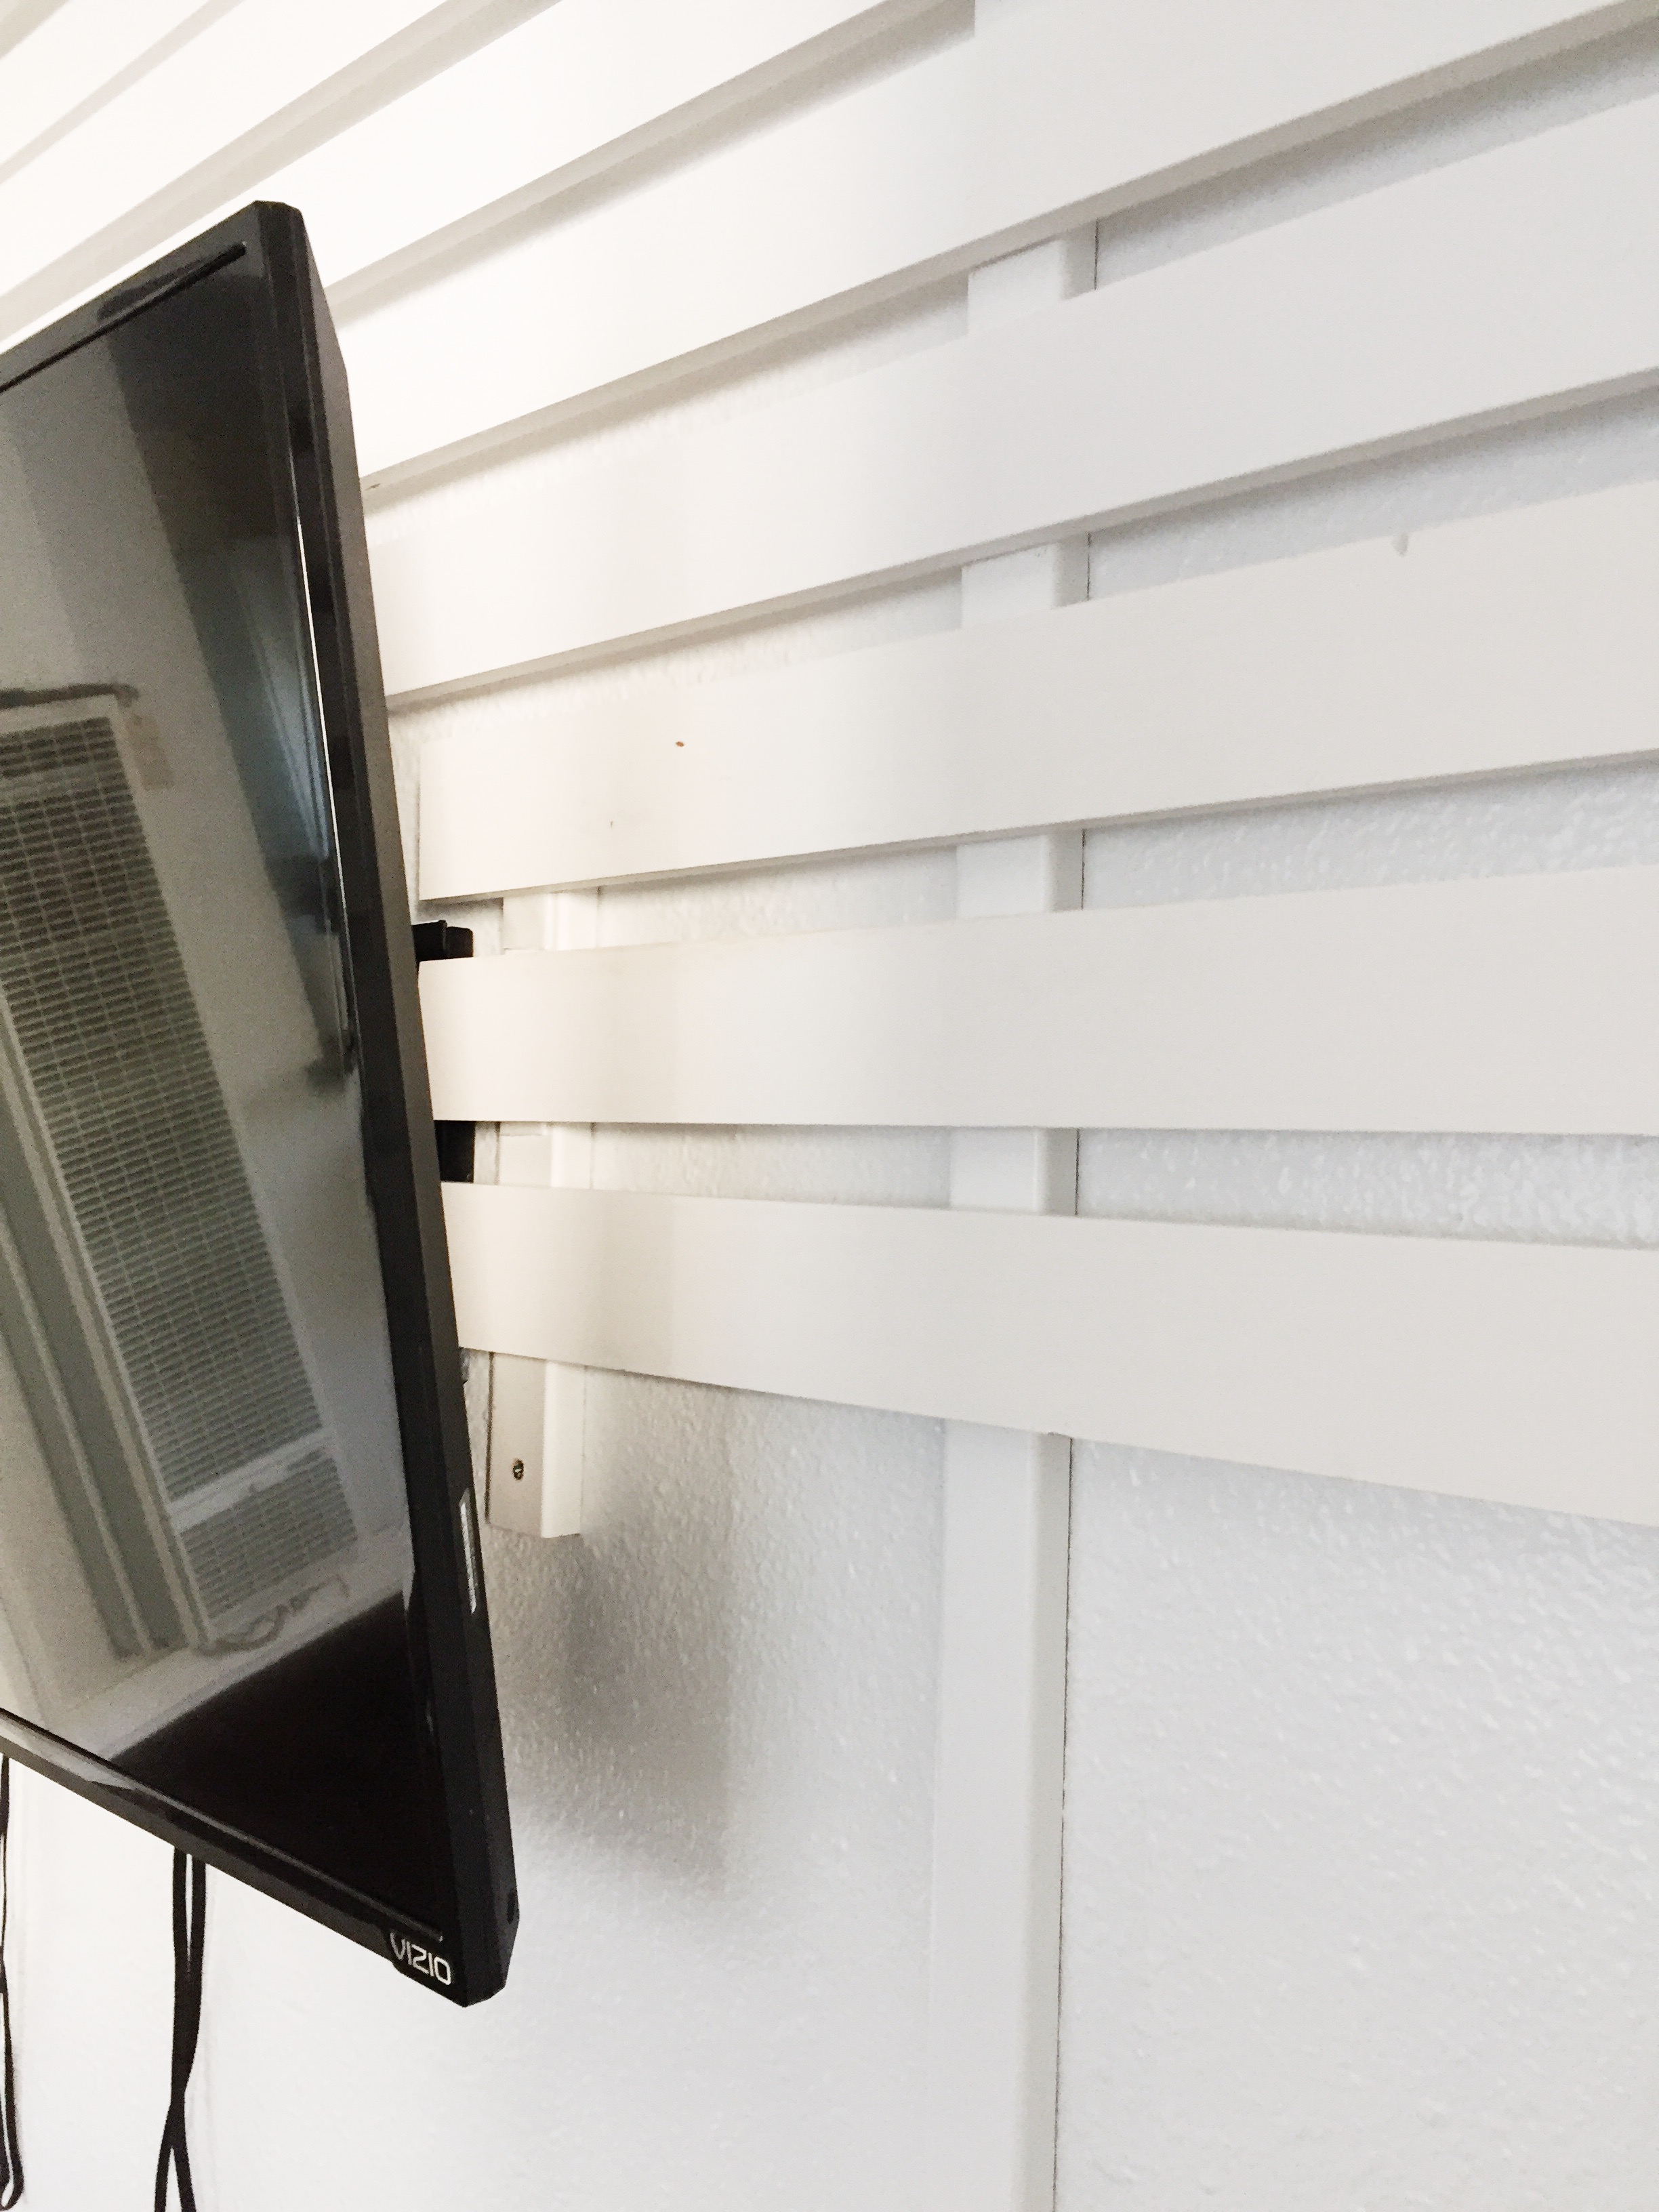
STEP 5: When you get to the TV Bracket, use your miter box to cut two small strips that are slightly longer than the height of the bracket and place to the left and right.
Then, hang and connect the cords to your TV before moving onto step 6.
STEP 6: Using your miter box, cut the slats to size and work them around your television. You will be adding the slats OVER the cords, so make sure these are connected before finishing your wall.
STEP 7: Add shelving if desired or hang sconces, art, you name it!